
 Tamiya Martini Renault Mk.22 Restore
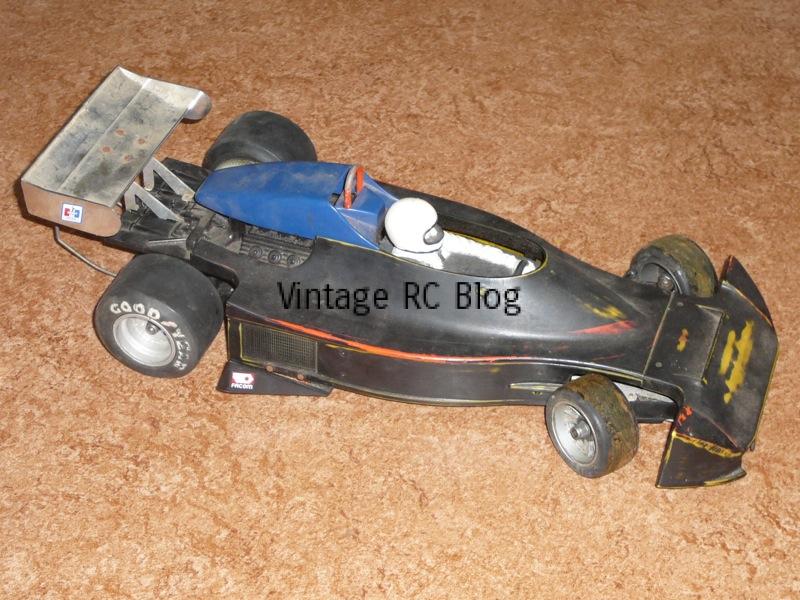
This car I obtained second hand in a job lot when I was about 15. With it I also received a Tamiya Celica LB Turbo and a Tamiya Hornet (restore links to come) for the sum of $40! I never really appreciated it when I was younger but did have a go a doing it up. I had tried to paint it black as the prior owner had painted orange stripes on it. I was probably thinking along the lines of a John Player Special theme, but the paint job was terrible, with wrinkles in the paint. It was eventually left in box after I had tried to sand it back, plus I didn’t really have anywhere to run it.
Step 1, Sort out Whats Missing and Strip Down with Brake Fluid
So the first thing to do is to see whats wrong, so I pulled it apart and found I needed to:
- ideally replace the front bumper bar as the previous owner had riveted an aluminium sheet to it,
- replace a piece of the front,
- replace the side mirrors,
- repair the rear where I had tried to cut out a section in an attempt to fit rocket engines (which I eventually ended up putting in the Celica LB Turbo,
- replace front and rear tires as they are cracked.
- make a new set of decals
Step 2, Paint Body and Fix Damaged Areas
 This was my first time at attempting paint removal, so after some research I decided to try Dot 4 brake fluid. This process took a few days to get rid of nearly all of the paint, leaving faint marks of the original orange paint that was on it when I received it. To me the brake fluid seemed to dry out the polystyrene body and maybe make it a little brittle, so I’ve decided not to use brake fluid anymore. I’ve since found either oven cleaner (I use Easy Off Bam!) or Dettol are great to use. I’ll post articles on both of those methods soon.
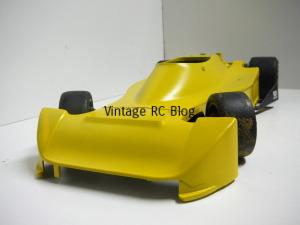 I actually did this the next part the wrong way around. I first painted the body, then repaired the front. No idea why! My other mistake was to prime the body with Tamiya’s light grey primer, when I should have used white to get a better yellow. The body had been give a light sand before primer was applied.
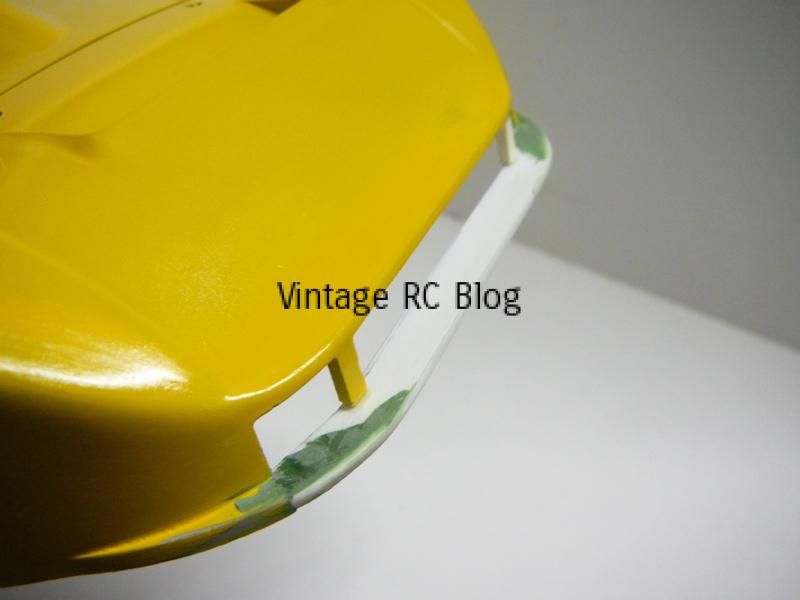 Then I repaired the front with a piece of 3 mm polystyrene sheet. This was hand shaped and glued in place. Later on you will see that the glue doesn’t hold that well, as after I restored this baby, I had to drive it, breaking my repair. I have since discovered a technique call “Friction Welding” which is basically an easy welding method for plastic. More on that later.
Step 3, Paint Rest of Car and Assemble
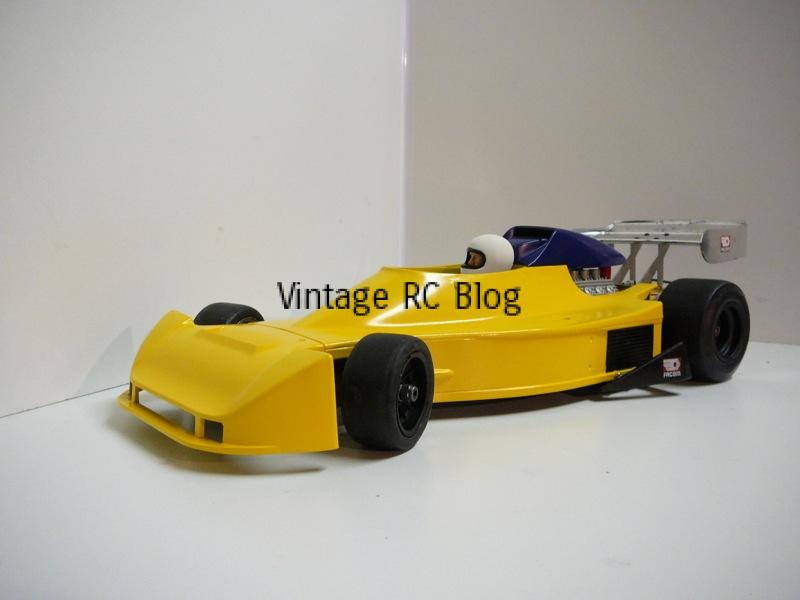 Next up was to paint the driver and also the reference shots I found had the rims in matt black. I also hand painted in the side air radiator vents and applied some minor detailing to the engine.
Step 4, Sort out Some Decals and Tires
 As the decal sets are hard to come by I made my own. I used a combination of vinyl cut decals and digitally printed stickers. If you want to know how to do this, I have written an article for TamiyaBase. You can find it here I also wanted to drive this car once or twice, so I used RM-01 rims and tires, being very close to the same size. I did do a test drive and managed to break off the repair at the front. I have since learnt how to friction weld plastics, a relatively easy technique that should give a better join.
While not a 100% restoration, as I still need to sort out mirrors and the chassis could do with a clean, I was happy enough with this so far. While I do have grand plans for most of my cars, I figured as long as I start, I can also come back to it. I haven’t modelled since I was a early teenager, so each project I learn and hopefully I will get better with each build.